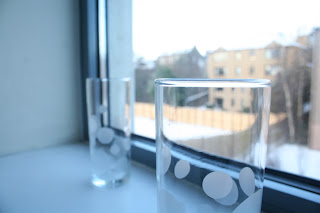
During the last few weeks i have been borrowing the canon 30D from the university loans to conduct different photography projects so i can apply what i learn to the camera within Maya, a 3D graphics software package. The following study is on the depth of field. Before starting this project i didnt know what aperture or F-stops ment, which are all terms used within the camera in Maya as well as for photography of live-action films. Something as simple as depth of field or a lens flare can trick the eye into adding alot more life to a 3D environment or animation.
During this study i learned how to adjust the shutter speeds, aperture and iso (light sensitivity) to capture the desired shot. I then went into Maya to replicate the same shot. In this case a shallow depth of field.
The image to the left was created by zooming out and moving in close to objects. Focused in on object in front. The shutter speed at 200 and F-stop down to 5.6 (lower F-stop focuses out more of the foreground and background and the aperture is controlled by these F-stops). The iso is turned down to 800 as the shots were taken early in the morning with lots of sunlight.
The image to the right uses the same attributes as the image above except the focus in on the object in the back.
I then replicated the same effect within Maya. Once a camera is set up in Maya you can access it's attribute editor. Half way down the list is a section called depth of field. Once this is activated the options are Focus distance, F-stop and Focus region scale. For the image to the left i applied a Focus distance of 12.3, F-stop of 5.6 (same as above) and Focus region scale i left at 1.
The image to the right had the same attributes as the image above except i changed the F-stop to 25. This gives a more subtle shallow depth of field because the F-stop is up a lot higher.
This shows the same results come from the Maya camera by changing aperture as from the digital camera but they use different techniques to capture the same effect. The break down of the Maya camera functions is that the Focus distance allows to choose which object in your scene to focus on, the Focus region scale allows you to choose the distance that focus will travel and the F-stop controls how blurred the out of focus objects become. Also its important to mention that if objects are rendered out separately through render passes from Maya that effects such as depth of field can be added in during the composting stage using software like After Effects or Nuke. This is usually the preferred way to apply these effects in a professional production pipe line. This means effects can be played with afterwards without having to render out scenes again which can be time consuming.


No comments:
Post a Comment